


Its Safety month! We want to ensure that not only your vehicle itself is safe, but your tiny passengers inside the vehicle are safe too. We brought in a Certified Carseat Technician to demonstrate the proper way to install a carseat. The video link will be below in the blog.

First Step
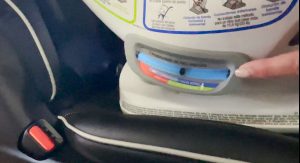
First, you need to understand the child’s age and weight? Depending on the age of the child will depend on a forward or backward facing carseat. Since this was a forward facing seat, set the proper balance of the carseat with the vehicle seat. To measure this, there are two levels on each side of the seat to let you know the proper angle.
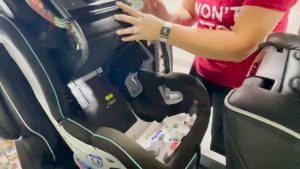
Opening the carseat and fastening the seat belt
There is a latch/lever on the front of the seat that will raise the seat. This allows the seat belt of the vehicle to be latched underneath. Once it has been lifted, slip the belt through the two slots in the back of the seat and latch the safety belt. Once the belt is latched, push the seat down and pull tight on the belt. Make sure the belt is pulled all of the way out so it ratchets up so it remains tight.
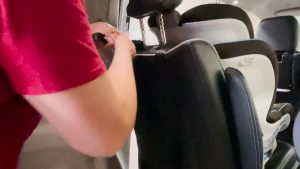
Attaching the clip and Tightening the Tether
Go to the back of the seat and latch the clip to the bottom of the seat and pull tight on the tether until the car seat is snug to the backrest. Once it is clipped to the back of the seat and pulled tightly, you are ready to strap your child in!
Strapping in the child
Start by buckling up the buckles by the child legs. Once buckled, slip the child’s arms through the shoulder straps and move the chest piece to arm pit level. Once the chest piece is in position, pull the strap down by the child’s legs tight so that the strap on the shoulders becomes tight.

YouTube Video